BloodHound - How to Set Up and Get Information About Your Active Directory
Today, I wanted to try to use BloodHound in an Active Directory environment. I have used it before in pentesting exercises during my education. In this post, I will try to explain how I configured my environment and how you can get some data into BloodHound. From how I created a lot of users, groups and ou’s using the BadBlood repository from GitHub, how to configure BloodHound Community edition in docker using Portainer and install Sharphound to get the data from the AD. I think I will make another post later, where I try to explain how you can use BloodHound.
Prerequisites
- A virtual machine that is running Windows Server and has the Domain Controller role installed and running (I did use Terraform to create a virtual machine in Azure that was running Windows Server 2022 with the Domain Controller role). You will also need to have Git installed. For example: Git for Windows
- A Portainer environment that can be used to run BloodHound CE.
Get users, groups, ou’s and etc - WARNING
WARNING!!! - THIS STEP CAN BREAK YOUR DOMAIN, ONLY USE IT IN A TEST ENVIRONMENT - WARNING!!!
To create a lot of users, groups, ou’s and more, I used the BadBlood repository on GitHub. Clone and install it:
git clone https://github.com/davidprowe/BadBlood.git

cd BadBlood

.\Invoke-BadBlood.ps1
When the installation of BadBlood starts you will be asked to hit any key 3 times (to accept that you understand that this can break your domain) and write the word badblood to accept to install it. This will generate about 2500 users, 500 groups, and 100 computers and add it to your AD.
BloodHound Community Edition
For BloodHound I wanted to use Portainer. Get the docker-compose file and create a new stack in your Portainer environment. In the docker-compose file I needed to change lines:
      - <MY PORTAINER IP>:${NEO4J_DB_PORT:-7687}:7687
      - <MY PORTAINER IP>:${NEO4J_WEB_PORT:-7474}:7474
Copy the .env.example and save it somewhere and modify the content of it if you need to. In my environment, I needed to change the BLOODHOUND_HOST variable to the IP of my environment and the variable BLOODHOUND_PORT to 8085 since I am using port 8080 already.
Now BloodHound should start and be ready. Go to the log and see if you can find the randomly generated password you need to use for first-time access (If you can’t find the password, change the log to display more than 100 last entries, and wait until the log refreshes. then turn off the auto-refresh function.).
2024-03-29T12:53:36.047692168Z INF ###################################################################
2024-03-29T12:53:36.047706946Z INF #                                                                 #
2024-03-29T12:53:36.04770905Z INF # Initial Password Set To:    <RANDOM_GENERATED_SECRET_FOR_FIRST_TIME_ACCESS>    #
2024-03-29T12:53:36.047710613Z INF #                                                                 #
2024-03-29T12:53:36.047712176Z INF ###################################################################
Get data for BloodHound
For AD you can use SharpHound and for Azure Entra ID you can use AzureHound. I will be using SharpHound here.
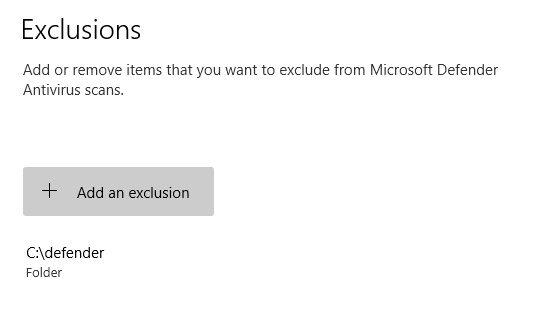
First, create a new folder and make an exception for that folder in Defender.
Download the latest release from the GitHub repository to the new folder you created. Extract the files into that same folder. Then run the Sharphound.exe file from powershell or CMD.
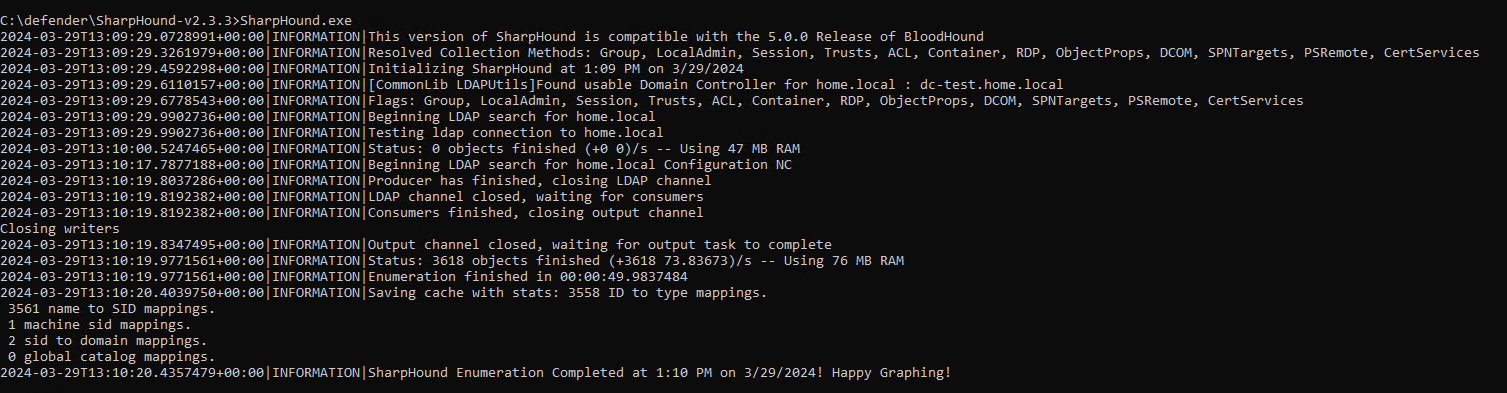
You will now have a ZIP file that contains multiple JSON files. Those are files that can be ingested into BloodHound.
Ingesting data
Go to your BloodHound instance and log in. Goto Adminitration and File Ingest. Upload the file you got from SharpHound.
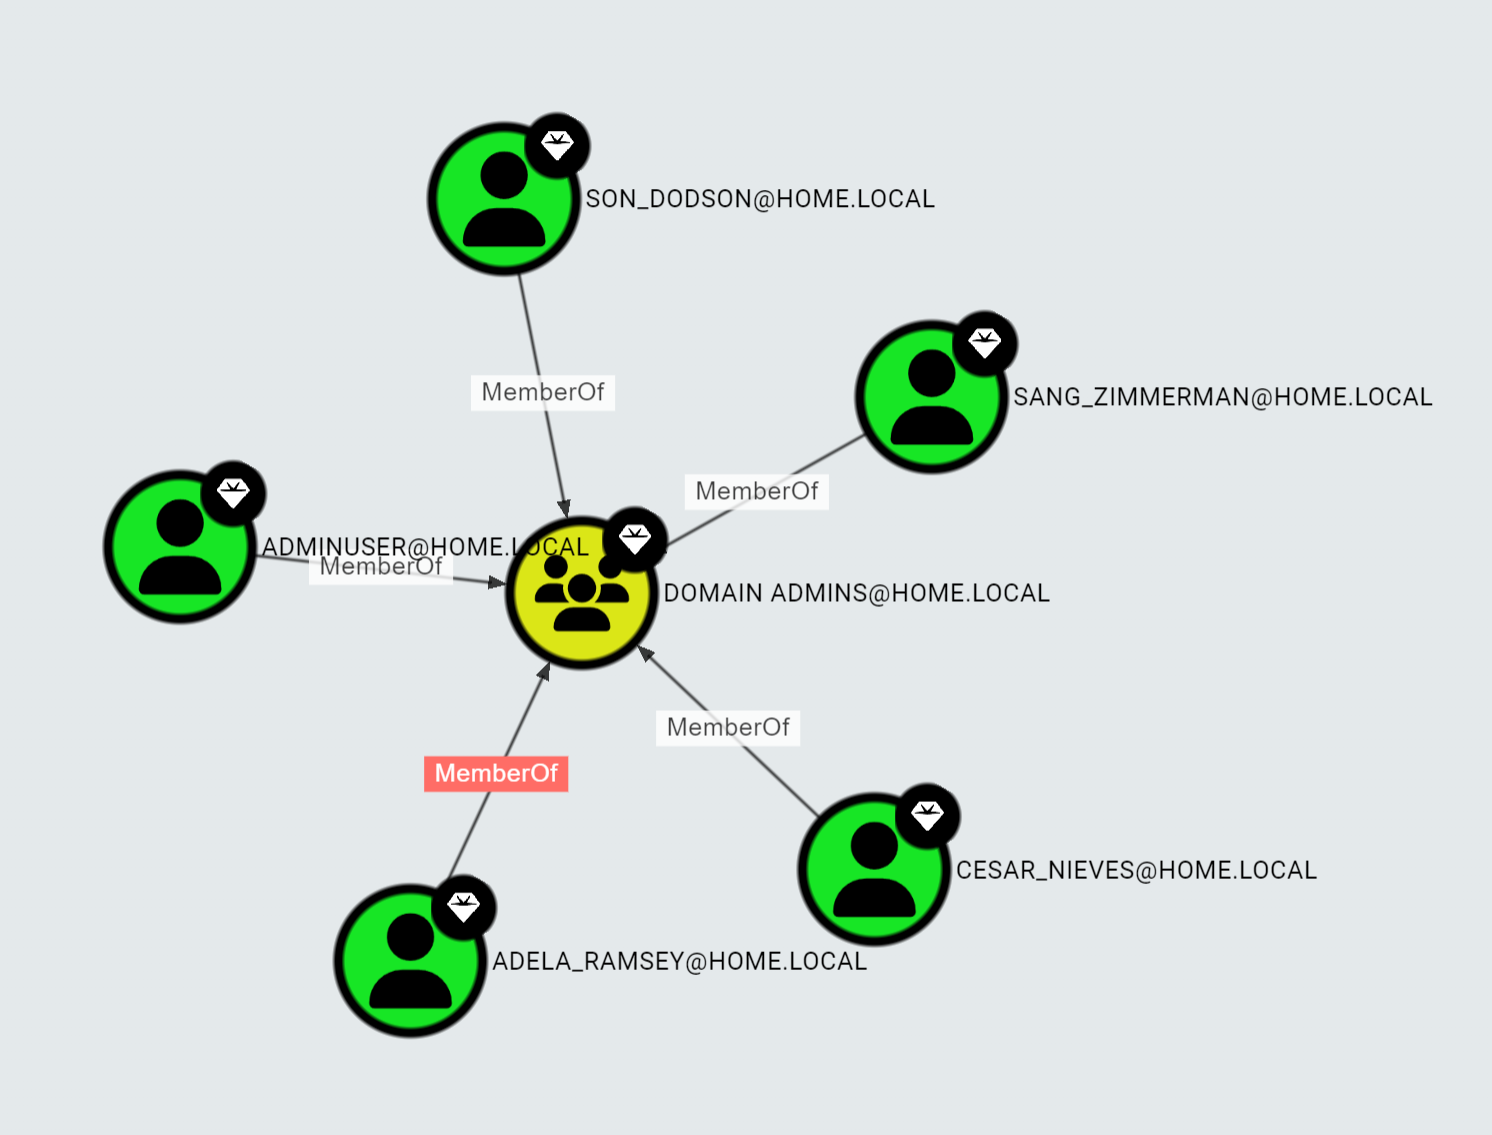
If you go back to your main page in Bloodhound when the files are completed its ingestion, you will see that there are multiple different methods that can be used. In the image below you can see one of the pre-buildt searches. It is the search for All Domain Admins.